Week 9 - Table cloth:
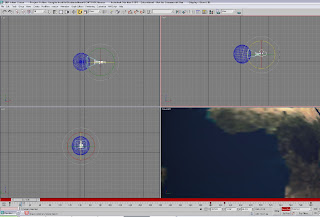
Here is a simple table cloth that I've decided to do since I am weeks behind from week 3. I create a plane positioning it at the top so that it can fall. Then placing a sphere and scale it so it looks like the surface of a table.
The next part is to use reactor to animate the cloth scene. Selecting reactor and applying modifier will have the effect of a real cloth and leave properties settings as default.
Then I go to reactor, create object and cloth collection so that the cloth ca animate. The cloth collection can be placed anywhere. For the cloth to react to the table, I select cloth collection and add it, so the name of the sphere will be sphere01. Place it under/ in the centre of the sphere and it should be ready to be animating. Also include keyframes.
This is my table cloth:
Friday, 20 March 2009
Tuesday, 17 March 2009
Ident 3
Week 8 - Ident 3:
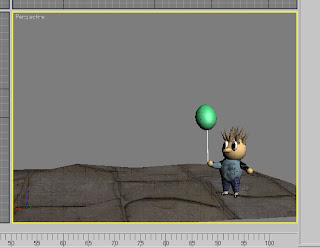
We are now heading to my last and final ident this month. The idea for this ident is to animate the balloon floating into the sky and then the logo will appear. The location/ the background is going to be near the seaside. But now there have been some changes to this ident. I’ve decided that I will include extra animation to this, so basically the balloon will continue to float to the sky but then floats right towards the sea in which it will then land on the water and that’s where the logo will appear.
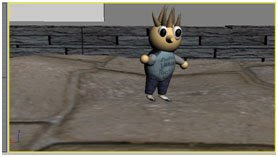
To begin with, I create my little character of a young boy. The whole body structures are used from spheres and cones.
For the textures, I basically use bitmap images to apply the body including his hair. As you can see its not quite in detailed but modelling characters is still a challenge for me.
I then try and make the clothing more realistic as I can, using convertible poly I drag how I want the clothing to be such as the jumper with some creases.
Now I need some ground/ pavement. Here I start off with a plane, and then convert it to a polygon I drag it to create the surface with some bumps because most solid grounds aren’t straight surfaces.
Creating 3 boxes is for the concrete wall that is for the safety measures incise the dangers of people falling to the sea.
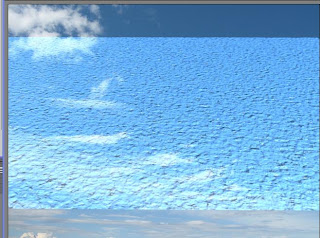
Ok so we now have a character, a surface and a short wall. The next step is to create the sea. Starting of with a plane, I select map, reflection and raytrace for the water effect. By selecting Bump then Noise, I can go to Noise Parameters and set its size by 8.0, setting it to Fractal that will then create a more realistic water effect.
Increasing the Specular and Glossiness to a high level, it sets the water to a lighter form.
Here is how the water looks like.
For the sky I need to it to surround the whole scenery. Applying a cylinder, and placing it to around sea, character, the wall and the surface it allows better view when rendering it.

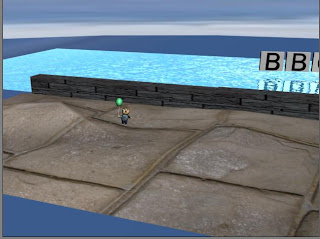
I need some light to boost the effects for the water. Again almost using the same method for my earth ident for the effects of the sun, I position an Omni light to the sky and setting the effects to glow.
And there you have it a nice beautiful looking sea.
Now animation:

Now animation:
One of the most important features to this is the water. This is my first attempt to animate the sea and literally it isn’t as hard as I thought. To begin animating, I need the Material Editor opened. If I go back to Maps and select Bump and back to Noise Parameters again, I can set the Phase level to its right effect for the water but to animate, I must first set a key to the beginning of the Time Slider and make sure that the phase level is 0. Then I set another key to the right end of the Time Slider so basically I then set the Phase level to about 15.

This is where my little character will move his head to look towards the balloon.

Using the Time Slider, I can move along the balloon to the specific destination where I want it to land.

The next scene is where we follow the balloon until it lands. It is quite simple, using the same camera it will follow the balloon.


At the end of the scene it will look like this. I rotate the balloon while set to Auto key.

You will see the water is still animated making the shorts waves more realistic while the balloon is floating. Also I animate the balloon up and down so that it looks like the waves are affecting it.

We are now heading to my last and final ident this month. The idea for this ident is to animate the balloon floating into the sky and then the logo will appear. The location/ the background is going to be near the seaside. But now there have been some changes to this ident. I’ve decided that I will include extra animation to this, so basically the balloon will continue to float to the sky but then floats right towards the sea in which it will then land on the water and that’s where the logo will appear.
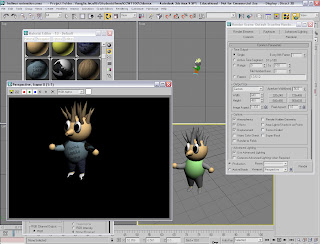
To begin with, I create my little character of a young boy. The whole body structures are used from spheres and cones.

For the textures, I basically use bitmap images to apply the body including his hair. As you can see its not quite in detailed but modelling characters is still a challenge for me.

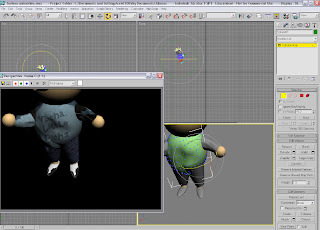
I then try and make the clothing more realistic as I can, using convertible poly I drag how I want the clothing to be such as the jumper with some creases.

Now I need some ground/ pavement. Here I start off with a plane, and then convert it to a polygon I drag it to create the surface with some bumps because most solid grounds aren’t straight surfaces.

Creating 3 boxes is for the concrete wall that is for the safety measures incise the dangers of people falling to the sea.

Ok so we now have a character, a surface and a short wall. The next step is to create the sea. Starting of with a plane, I select map, reflection and raytrace for the water effect. By selecting Bump then Noise, I can go to Noise Parameters and set its size by 8.0, setting it to Fractal that will then create a more realistic water effect.
Increasing the Specular and Glossiness to a high level, it sets the water to a lighter form.
Here is how the water looks like.

For the sky I need to it to surround the whole scenery. Applying a cylinder, and placing it to around sea, character, the wall and the surface it allows better view when rendering it.


I need some light to boost the effects for the water. Again almost using the same method for my earth ident for the effects of the sun, I position an Omni light to the sky and setting the effects to glow.
And there you have it a nice beautiful looking sea.
Now animation:

Now animation:
One of the most important features to this is the water. This is my first attempt to animate the sea and literally it isn’t as hard as I thought. To begin animating, I need the Material Editor opened. If I go back to Maps and select Bump and back to Noise Parameters again, I can set the Phase level to its right effect for the water but to animate, I must first set a key to the beginning of the Time Slider and make sure that the phase level is 0. Then I set another key to the right end of the Time Slider so basically I then set the Phase level to about 15.

Here is a short animation of the sea.
Animating the scene. The scene starts of with camera to view the sky and then views the surface slowly almost similar to ident 2.
This is where my little character will move his head to look towards the balloon.

Using the Time Slider, I can move along the balloon to the specific destination where I want it to land.
The next scene is where we follow the balloon until it lands. It is quite simple, using the same camera it will follow the balloon.

At the end of the scene it will look like this. I rotate the balloon while set to Auto key.

You will see the water is still animated making the shorts waves more realistic while the balloon is floating. Also I animate the balloon up and down so that it looks like the waves are affecting it.

Now I need sound to finish off my last ident. I’ve decided to use an ocean sound effect than music as it makes this ident very calm especially my water animation, which I feel it needs some sound to fit the scene.
This ident that I find is probably the best one that I’ve done. Normally my last 3D model never as good as my first ones but this time I feel very pleased with the effort that I have made into this. Animating the water wasn’t’ as difficult as I would have thought. It merely knew each step, how to use the effects and animating. The possible improvement that I would suggest is the shadows on my little character. I have used an Omni light and setting it to raytrace shadow but it never seem to work.
This ident that I find is probably the best one that I’ve done. Normally my last 3D model never as good as my first ones but this time I feel very pleased with the effort that I have made into this. Animating the water wasn’t’ as difficult as I would have thought. It merely knew each step, how to use the effects and animating. The possible improvement that I would suggest is the shadows on my little character. I have used an Omni light and setting it to raytrace shadow but it never seem to work.
The most disppointment was the string. I found it quite difficult to animate the swirl but using other methods, I tried to morph it using two objects to manipulate the realism of the string but that didnt accomplish. This was quite challenging but I could not animate it instead I've only animated the balloon itself. I have now animated the balloon to swirl almost having the affects from the wind so that it does not float so calm.
This is my final animation BBC 1 ident 3.
Friday, 13 March 2009
week 7
Week 7: Ident 2
This is my second ident for the BBC. I thought sports is important to the world particularly football such as the World Cup.
There are so many ways that I can produce and animate for this ident and so the way that I am going to do this is by creating a goal on a pitch, then create a leg and a football. What I will do is then animate the leg so that it kicks/shoots the ball to score a goal. Although animating the goal is going to be a challenge to me because the net has to move when the ball strikes through. This was one of my main ideas but I needed to re-think another possible way.
The way that I am going to do is keep the scene when the leg kicks the ball but I will not include the goal scene. Instead I will straight away use the camera to view the mark of the ball on the grass and then make the logo appear. I will only create half a stadium as I only need for the background where the camera is viewing.
The quickest and easiest model to make was the ball. All I need was a sphere, and then using a bitmap image of a football, I merge it to the sphere and there you have it a football.
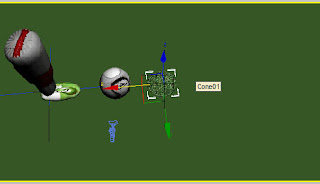
The next step, which I find quite challenging but hard was the leg. Modelling it correctly is one of my disadvantages and this is how I’ve created it. I use a cone, and then convert it to a polygon so that I can use Border to manipulate the figure of a leg. To smooth it, I’ve used MeshSmooth.
It needs movement and so applying bones will then allow me to animate it.
Although it is a leg, a footballer needs to wear a sock. Again using a bitmap image I merge it to the cone/ leg.

I need to spread all the cones so that the whole terrain is covered with grass. To that I use scatter, duplicating 200 cones. Although the screen dump underneath shows no grass, just plain green surface but don’t worry, it is there.
A football stadium might be worth to include for the background.
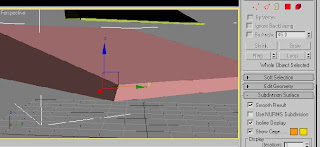
I’ve made a stage set for the seating area, using a box, converted to a polygon and used vertex.
This is where I include the rooftop. Again applied a box and scale the precise size.
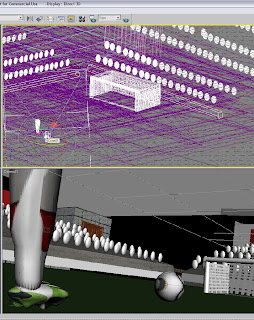
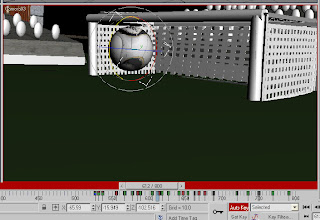
I need a goal and so I’ve quickly made 3 cylinders as the post. I will include a net behind the post later as I have not figured the solution to creating it yet. I’ve included another stage set behind the goal post by cloning the previous one and just by rotating it to its position.
I feel the background needs to be more realistic or need something to support the stadium and so I’ve added a pavement, a wall and an exit doorway.
If I render it, you will see how my stadium looks so far.


To finish the touch, I place an Omni light of the effects for the shadows.
To make it more interesting, I’ve decided to add another scene to this ident. That means I will need to update my storyboard.
This part of the scene is after the ball has been kicked and so in this the camera view (camera 3) the ball will drop down so that the effect of the ball will bounce several times and roll while the rotatation continues, until it reaches the end of the view shot.
The final part finishing off animating this ident is the BBC logo and the mark on the grass. I use another camera (camera 4) and position it from where the ball bounces to on keyframe 586. I then create the mark by adding a sphere to the field, scale it to form a flat sphere and then position from the bounce.
Animating the texture of the grass to get this effect is difficult to structure. As it is planned from my storyboard, I will not need to animate the grass effect.


This is my second ident for the BBC. I thought sports is important to the world particularly football such as the World Cup.
There are so many ways that I can produce and animate for this ident and so the way that I am going to do this is by creating a goal on a pitch, then create a leg and a football. What I will do is then animate the leg so that it kicks/shoots the ball to score a goal. Although animating the goal is going to be a challenge to me because the net has to move when the ball strikes through. This was one of my main ideas but I needed to re-think another possible way.
The way that I am going to do is keep the scene when the leg kicks the ball but I will not include the goal scene. Instead I will straight away use the camera to view the mark of the ball on the grass and then make the logo appear. I will only create half a stadium as I only need for the background where the camera is viewing.
The quickest and easiest model to make was the ball. All I need was a sphere, and then using a bitmap image of a football, I merge it to the sphere and there you have it a football.
The next step, which I find quite challenging but hard was the leg. Modelling it correctly is one of my disadvantages and this is how I’ve created it. I use a cone, and then convert it to a polygon so that I can use Border to manipulate the figure of a leg. To smooth it, I’ve used MeshSmooth.
It needs movement and so applying bones will then allow me to animate it.

Although it is a leg, a footballer needs to wear a sock. Again using a bitmap image I merge it to the cone/ leg.

I need to include a football boot. To do this I create a sphere, scale it for the precise size, then use vertex by converting to a polygon. Also I can use vertex to create studs for the boot like this screen dump underneath.
I’ve now made a leg with boots and a football. The next step is to create a pitch/ grass. All I need is a plane for the surface and nothing else. The grass is simple, I use 2 or 3 cones then setting its radius to 1.438 another word is making it really thin because in a pitch the grass is very short and slim.

I need to spread all the cones so that the whole terrain is covered with grass. To that I use scatter, duplicating 200 cones. Although the screen dump underneath shows no grass, just plain green surface but don’t worry, it is there.
This is the textture for the grass for the football pitch.

A football stadium might be worth to include for the background.
I’ve made a stage set for the seating area, using a box, converted to a polygon and used vertex.
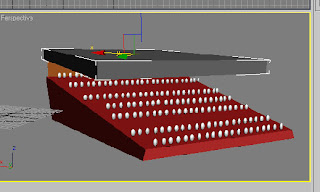
Then I need to include seats and so I simply applied spheres to the stage and coloured them as white.

This is where I include the rooftop. Again applied a box and scale the precise size.
I need a goal and so I’ve quickly made 3 cylinders as the post. I will include a net behind the post later as I have not figured the solution to creating it yet. I’ve included another stage set behind the goal post by cloning the previous one and just by rotating it to its position.
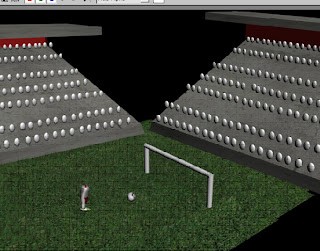
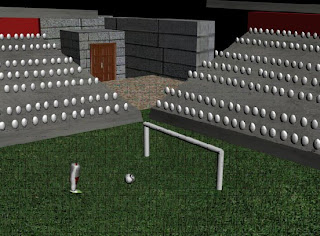
I feel the background needs to be more realistic or need something to support the stadium and so I’ve added a pavement, a wall and an exit doorway.
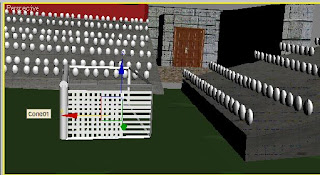
The final part modelling for my ident is to finish off the net for the goal post. I could not find any tutorials to help to create the net and so I’ve created it with my own method. By using a box, placing behind the goal posts, I modify it to lattice and then set its radius to a very thin size including the size of the struts and joints. I convert it to a polygon and highlight the front of the box to delete it so that there is no bar at the bottom.
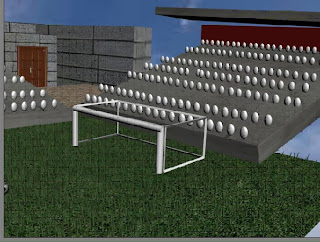
If I render it, you will see how my stadium looks so far.
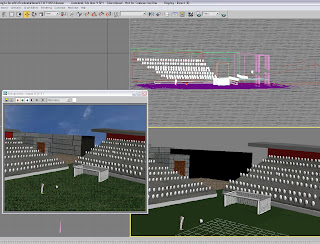
Now the hard part, animating. To start of the beginning of the scene, I place camera 1 (free) right on the pitch and rotate it so it faces the sky. That’s where it will start.
Using camera view, I rotate it slowly viewing the sky, then onto the main scene where the rotation stops when we see the leg, the ball and the goal post.
Using camera view, I rotate it slowly viewing the sky, then onto the main scene where the rotation stops when we see the leg, the ball and the goal post.


This is where the next scene begins. The camera view very close to the ball and then the ball gets booted. But in order to do view this, I cannot use camera 1, as the camera will literally move from the beginning of its frame to the end, making the view incorrect. The way I can manipulate this is placing another camera (camera 2) and then render it to a different file and edit both scenes together, using Premiere Pro/ Moviemaker.

To finish the touch, I place an Omni light of the effects for the shadows.
To make it more interesting, I’ve decided to add another scene to this ident. That means I will need to update my storyboard.
This part of the scene is after the ball has been kicked and so in this the camera view (camera 3) the ball will drop down so that the effect of the ball will bounce several times and roll while the rotatation continues, until it reaches the end of the view shot.

The final part finishing off animating this ident is the BBC logo and the mark on the grass. I use another camera (camera 4) and position it from where the ball bounces to on keyframe 586. I then create the mark by adding a sphere to the field, scale it to form a flat sphere and then position from the bounce.

Animating the texture of the grass to get this effect is difficult to structure. As it is planned from my storyboard, I will not need to animate the grass effect.

The last scene will then fade slowly showing the BBC logo.

For the sound I need some effects and music to suit the atmosphere. Because it's football, I've decided to use one of the old but famous songs during the World Cup in 2002. It is called Dario g canival de paris which was also used in the movie Mean Machine. Using a basic sound editing software, Audacity I also applied some remix to it such as speeding the tempo up. I want the atmosphere in it and so I've included some real sound of fans from the crowd in a stadium. my last sound effect would be the ball. I have a bounce effect and so I apply the scene when the ball gets kicked and obviously when it bounces.
Possible improvement to this ident would have been modelling the whole structure as maybe add more texture to the stadium and model the leg in more depth and accurracy. Another possbile improvement would be to include grass animation to make the scene feel more realistic to the atmosphere.
Here is my second ident.
Friday, 6 March 2009
Week 6
Week 6: Finishing Ident 1
The animation is complete. All I needed was to include a sun and then the effect to glow in the scene. I've applied a sphere as the sun. Then for its detail, I use photoshop to apply them on the sphere.

When I apply this material to the sphere, it did not look convincing and so I use an Omni light to help and make more effects to the sun.
The animation is complete. All I needed was to include a sun and then the effect to glow in the scene. I've applied a sphere as the sun. Then for its detail, I use photoshop to apply them on the sphere.
When I apply this material to the sphere, it did not look convincing and so I use an Omni light to help and make more effects to the sun.

Applying the omni light to glow I need to select the Enviroment and Effects menu.
Through this I need to select the panel and add Glow, then I pick a light from the bottom and select Omni. That is how I used a glow effect.

The theme:
Sometimes channels only use music to support the feel of their idents and I thought a sound effect for this ident does not necessarily need one. I've searched and donwloaded a nice and calmly music which is an actual song but all I needed was the first 31 seconds and so using Audacity, I highlight and delete the ones are not required. Just for the last 3 secs for the end, I use a fade out effect to end the theme which goes nicely with my ident.
Originally, there were not suppose to any music/ theme to this. The sound ideally was to be sounds of people, engines of vehicles, planes and more while the earth rotates. I've decided to chnage the theory and input a music instead as I re-watched my ident thinking that this would sound more beautiful if I use a calm and peaceful music.
Here is my first BBC 1 ident.
I find this was probably one of the most interesting and enjoyable 3D modelling and animation effort. Although this was merely an extent of animation, I still find this was a positive effort as this animation was quite basic but in theory this was my first ever attempt on animating a 3D model.
Wednesday, 25 February 2009
Week 5
Week 5: Continuing with ident

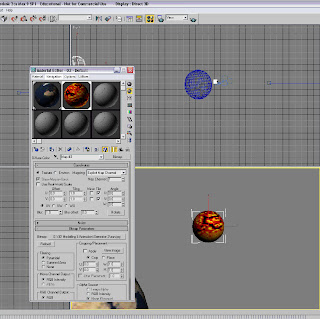
My next step is to create a sun for the background as I want some lighting to shine to the earth. To create the sun, I start with a sphere. I've then need to edit/ create the element of the sun and so I've used Photoshop to modify it, using various filters such as Colour Balanace and Unsharp mask. It turned out satisfying but I am missing the final touch of the sun and thats the glow.
My first ident is almost complete. I now need to search for a theme/ music to suit the background.
Looking back at my last post of the wmv, I've decided to extend the length of the animation because it was slightly short and so I've added more frames upto 1000. This also allowed me to animate the earth into a slower rotation. To do that I edit and delete all the keys on the frame and add new keys about 200 frames each.
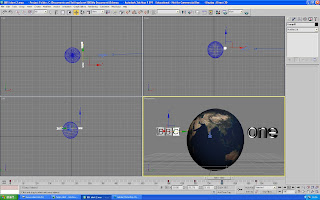
The next step was to create the logo. Using a box (coloured white), I will use it to apply for the "BBC" background. The text (coloured black) will be placed in the centre of it. Animating the logo is straight forward, I select and move the "BBC" and "one" at the same time from both sides. Another idea was to animate them to swirl around the earth but originally my thoughts was to make them move from both sides.
For the camera I almost find it difficult to place at its right location because it is suppose to be zoomed in, close range to the earth and then zoom out slowly. The problem is that I tried to use a line and then use path constraint so that the camera will follow the line backwards, but unfortunately it failed to move.
How I managed to get the camera moving?
It was quite simple, I set a keyframe, then gradually drag the camera slowly (while viewing on camera) so that I can see how it is zoomed correctly. No line needed.
My next step is to create a sun for the background as I want some lighting to shine to the earth. To create the sun, I start with a sphere. I've then need to edit/ create the element of the sun and so I've used Photoshop to modify it, using various filters such as Colour Balanace and Unsharp mask. It turned out satisfying but I am missing the final touch of the sun and thats the glow.
My first ident is almost complete. I now need to search for a theme/ music to suit the background.
Thursday, 19 February 2009
Week 4
Week 4:

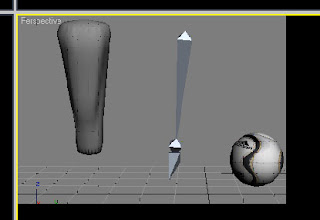
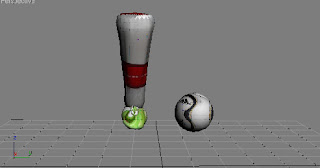
This week we've learnt how to animate the bones when we are dealing with character animation. This is going to be a short summary of what I've learnt. I basically used a cylinder for the skin, then from the modifier panel I select Bones and used LKlimb for the bones. I then need to place the bones inside the cylinder so that I can move/animate them at the same time. To do this, select the cylinder and from the panel, add the bones and select them.
So far so good:
Althought I have started working on both my idents already (but had no time to upload my progress), I begin with my earth ident/ ident 1.
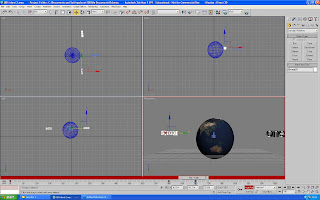
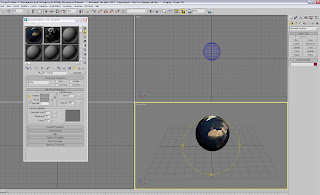
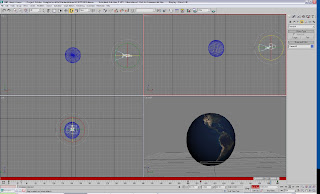
I've created a sphere first for the earth. Then from the material editor, I used a bitmap image for the whole landscape.
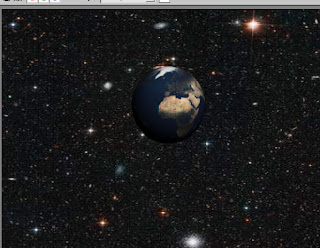
With the background it is quite obvious that I would use a space image for this as creating it would be impossible.
Animating is tricky but it can be done. The very quick and easy animation I've done with the earth was to make it rotate slowly. I need this to go very slow and so setting the frames upto 800 will effect its rotation. With the camera (Free target) was straight forward, all was needed is to place the camera infront of the earth, then gradually move it slowly plus setting its key on the specific frames for it to zoom out correctly.
This is so far what my ident looks like. My next step is to apply the BBC logo and add sound/music for the background.
Subscribe to:
Posts (Atom)