Friday, 6 February 2009

Week 2

Week 2: Using camera

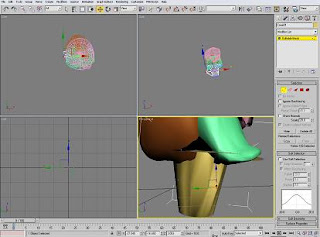
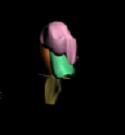
My first attempt using the camera to animate the surroundings of an object etc. was quite basic and easy to use. What I've done was created a sphere/ face, then added a circle to surround the face so that the when I set the camera to Path Constraint, it will follow or go around the circle. Also I've selected "Target" from the "Object Type" for the camera so that it is targeting the object when watching on its view point.


This is how it will look like.


Week 2 - using camera

Week 2: Animating using camera angles

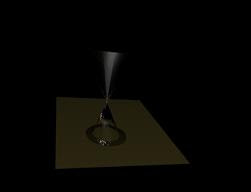
Our task this week was to create an animation of a room using the camera to constraint the right angles when watching the animation. Some pupils have used the camera to zoom in the room/ house but I've decided lets zoom out. Although this is my first attempt to use the camera for the animation I will find it useful for the assignment.


First to begin with I create a room by using "box", then I create another one for the doorway using another box placing it on a wall, then "Boolean" it.


I then create more boxes to extend so that I have at least a
nother room. Also I've repeat the same method in order to create another doorway.

Now the main part is to animate with the camera. I place a "line" inside the room, setting its Initial Type and Drag Type to "smooth". That way the camera can then follow the line smoothly.


Right, to use the camera, I basically place it above the "line". Then to allow the camera to follow the line, I go to Animation, Constraints and select Path constraints. Which will then connect to the line. I set the camera to "follow" so that it will follow the line nice and smoothly. I've also need to rotate the camera as I've selected its Object Type as "Free".


There we go this is my animation.


Thursday, 5 February 2009

New plans

New plans: Research board

Realising that the channel I was going to animate on, was ideally going to be alot harder than I have thought. In that case I have to re-think about my ident and start a new research and mood board. The possible channel that I could really go for is BBC1 since I admire the way they focus on the circling round with many different features.

In order to create an ident of BBC1 I need to research some what I find is interesting. Here are four images that I've basically searched on Google. These are the ones I find quite beautiful, some how it makes you feel comfortable.

New mood board:

BBC represents the nature, enviroment, people and the world. That is why the form of the circle gives me the ideas of what really meant about that circle.

BBC uses alot of many ideas for their ident. At the moment all I can think of is how and what I can use to animate to form a circle. One of my mood bored will be a person, kicking a football which then the ball rolls away on the grass and marks a circle of the BBC ident.

My second mood board will be a child holding a string attached to a balloon. The child then release the balloon and lets it float to the sky.


The third mood board is life of the world.


Tuesday, 3 February 2009

Research board & Mood board

Week 1 - Research Board:

During these first couple of weeks, I've been researching a few channels to give me some ideas for my animation "Ident". Since all I can remember is the most popular channels and I've decided to search for Channel 4. This is quite interesting process the way Channel 4 implement the structure and the ways they form the number "4" together in different scenes, such as the one from the High street estate and in Tokyo. I find it quite fascinating of its work.

Another good but funny one is the Homer Simpson one, where he touches the beers, dangaling from the electrical wires and he gets electricuted by them. Then from zooming out viewing the whole streets above, it forms a light of the number 4.


Mood Board:

Since Channel 4 always film at various locations around the world for perfection. I've decided for my first mood board to be in a location of nature which is the rainforest. My next idea would be living and surving through the rainforest. As of that you need to cook and so I've used a frying pan to fry sausages which will then form the number "4".

The second mood board is located in a train tunnel as the train travels through the end of the tunnel, you will see a number "4" above from the trees.

Thursday, 29 January 2009

3D Animation

Week 1: Basic animation


For our second semester, we begin to learn a whole new feature and thats animation. We've first learnt how to animate a ball, bouncing from top to bottom. There are various techniques to animate an object which I have found quite confusing first but learning the basic features, it isn't as difficult as it seems. For now. Learning to use the Time slider to animate the object, you can also use the Mini Curver and Curve Editor to move the object manually.


Here is a basic bouncing ball.


My first animation:

For my first attempt on creating a 3D animation, I've started creating three spheres, a cone and a box. I combine the cone and box to form as a similarity to a gun. Then I begin to place the spheres (as bullets) at the gun where it will shoot from across the screen.

To set the animation, I select Autokey so that the frames are set to be an easy way to animate. I then go to the Time slider and set the right timimg of the movement from the frames. It is an easy step to apply through as it is basically setting which frames to the animation.

Overall I feel on my first attempt has been a slow start to begin with as animating on 3D studio max is all new to me. I hope in the next couple of weeks I will gain some knowledge on how to animate more frequently.

Here is my very short animation:

Saturday, 15 November 2008

3rd 3D model - August (Summer)

August

My final 3D model which represents Summer. For this month I will will create an icecream, a table and two glass.

To begin with my icecream, I started creating a cone which was the more obvious to make. I then added three spheres which will be the icecream that goes on top of the cone. To make the icecream melt all I did was convert it to a poly and then used Soft Selection to drag certain areas around the sphere to make it melt.


I’ve finished adding my three icecream flavours onto the cone. I needed to create the cone more realistically. To do so I’ve used the Vertex to amend the cone into a more realistic look.
To start of with the glass I draw a curvy line in verticals to get the shape. Then I select the modifier window and apply Lathe which gives me this. Above all my models I set an Omni Light effect to shine.

This is where I create my straw, I select a cylinder and set its Radius to 3.185
and Height to 112.69. Then I use Bend modifier and set its Angles 90 which looks like this.
This is the drink which is a cylinder and is placed in the glass along with the straw. To create the glass itself I go to Material Editor and set the Glossiness to 56 and level 92. Then I click on Maps and tick Refraction and there you have it my glass is complete.


This is how the glass look like.


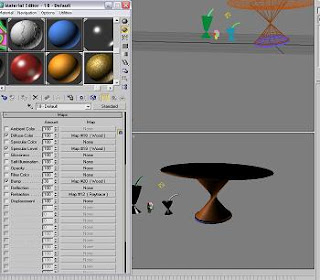
This is how I’ve created the wooden material from the Material Editor. On Maps I selected Diffuse Color, Specular Color and Bump to set its Coordinates and Wood Parameters.


On Diffuse Color this is what I need to set for the Tiling, Angle, Grain Thickness, Radial Noise and Axial Noise.


I repeat the same settings for Specular Level.


The settings for Bump is going to be different.

After that this is how it should look like.


Now I drag the wooden material effect to my table and should look like this.


My last 3D model for this calendar month was actually my first model I have started creating on. It is the best model I have ever done and this was a challenging task to do, creating glass and the wooden material for the table.

My ideas was originally an icecream with the background as a beach but to make it more interesting I’ve decided to create not just an icecream but include two sets of glass on a table. The table was sophisticated as I’ve tried to create the stand by extruding it from a cylinder but it never worked out as planned. Again with the help from some tutorials, I found it very useful. Overall I’ve enjoyed working on this one.


2nd 3D Model - April (Easter)

April

This is my second calendar month of April which represents Easter. For my assignment I’ve decided to create a 3D model of a basket full of Easter eggs in it including a background with a tree and grass as the layout.

To begin with I first create a cylinder shape, then set its parameters from the Modify panel as Radius: 14, height: 24, segments: 5, cap segments: 1 and the sides: 18.


What I’ve done next is converting it to Mesh and then set to Polygon. I then click on the top and deleted it to make a hole for the basket.


I’ve added Taper modifier and set its parameters to its Amount: 0.7 and its curve: 0.15

Then I’ve added its lattice modifier which will look like this.
Now if I set the parameters for the Struts and the Joints I then create slim bars which will look like this.


To start of creating a land, I first select the plane from the control panel. Before adding grass, I need to convert it to a polygon and then drag and move its verticals around to get the correct adjustment in making a land.


Once the land is done, I then need to add grass. In doing this I change the Standard Primitives to AEC Extended.


To create a piece of grass I first create a cone. By adjusting the right size I want, I simply enter 1 for Radius 1, 0 for Radius 2 and 40 for the Height.

I then select Bend from the modifier panel and set the cones angle to -14.0.


To scatter around the plane I simply go to Compound Objects and select Scatter. Then I also click on Instance from the Pick Distribution Object. Now to finally scatter the grass I type in 200 for Duplicates. I also another cone and repeated the same method from the previous one and this is how it should look like when rendering.


To start of I’ve created a sphere with there parameters Radius: 2.5cm, Segments: 3.2 this is the size of what the egg should look like. I then convert it into on Editable Poly by right clicking it.


In the modify panel in the selection part I select Vertex. This will allow me to view all parts of the shape in vertexes, which allows me to drag the top of the sphere and form it into an egg shape.


Opening the soft selection I check the “Use Soft Selection” and then set the Falloff volume to 3.2cm. I’ve also used colour materials to create the eggs with covers on it.

Another 3D model I have included is a rabbit. This was a very simple structure to make. I simply used a lot of Spheres and couple of Lines to develop this.


To finish off my model I’ve added a Bitmap image for my background which all needed to do is click on the Environment Map. I’ve also added a tree to make it more a natural environment.


That is my final completion of my Calendar month of April.


For this calendar month my second attempt I’ve find this one more challenging as I decided to create a basket for the Easter eggs. With help from tutorials, again I learnt new techniques and materials of creating this. I found creating the grass and the rabbit was easy to implement.